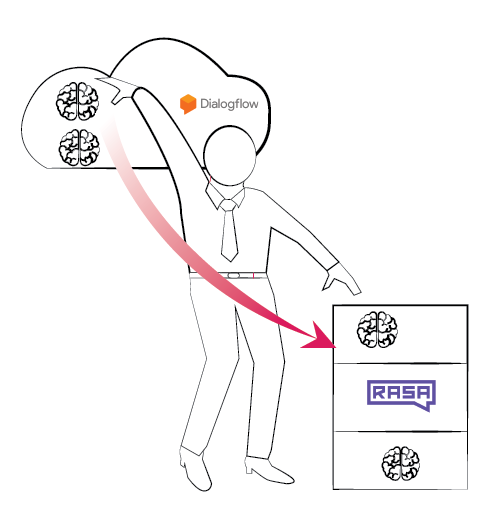
Quick guide - moving your chatbots from Dialogflow to RASA in minutes

Introduction
In this ever-growing market of chatbots, almost all of the NLP engine is hosted in cloud infrastructure which means all of the user data, information and queries would be stored in the cloud.
The idea of the NLP engine with cloud infrastructure works in the scenario where the information or knowledge base of the NLP engine encompass knowledge that is available in the public domain.
But this doesn’t attract the potential users who want to leverage the NLP technology to achieve interesting stuff such as enabling monetary transaction over the internet using bots. Prominent NLP engine like Dialogflow, MS LUIS, IBM Watson privacy policy guarantees the security of user data but a lot of potential clients are still sceptical about using chatbots.
But what if I tell you that you can own the NLP technology in your own private server or on your local machine.
This sounds like a good idea to those who plan to use this technology but for those who are already using chatbot and having an existing infrastructure for the same might say
“Why would I would migrate an existing operational Chatbot cause it clearly sounds like a lot of capital investment and it will require time too!”
But what if I tell you that you can do the same within minutes
Sounds Interesting! Follow along then.
The tool that makes this possible is called the rasa stack
The Rasa Stack
The Rasa Stack is a set of open source machine learning tools for developers to create contextual text- and voice-based chatbots and assistants. Rasa stack has two components
- Core -> a chatbot framework with machine learning-based dialogue management
- NLU -> a library for natural language understanding with intent classification and entity extraction
NLU and Core are independent. You can use NLU without Core, and vice versa. In this blog I am going to cover the migration of a dialogflow agent in the Rasa Stack.
NOTE:
- Installation for Rasa stack is not covered in this blog. For installation refer to documentation
- Rasa nlu version 0.11.4 and Rasa core version 0.8.6 is used for the purpose of writing the blog
Steps for migration is given below
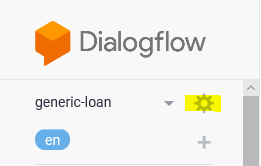
STEP 1
Login to dialogflow, select the agent and go the agent settings
Export the agent as zip
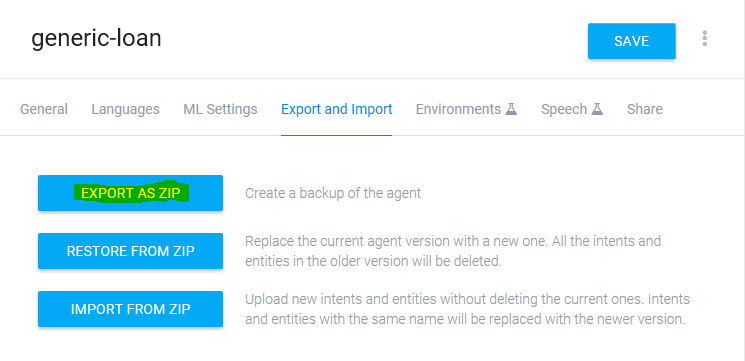
Save the zip file

STEP 2
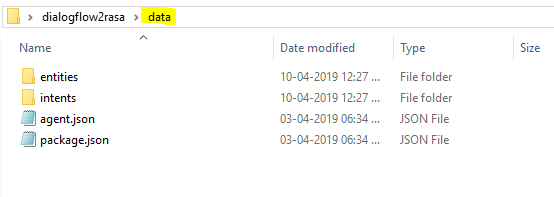
Create a folder named dialogflow2rasa, within that create a folder named data and also extract the content of the zip file exported from dialogflow to the data folder

data folder will look like this after extracting the content from zip file
STEP 3
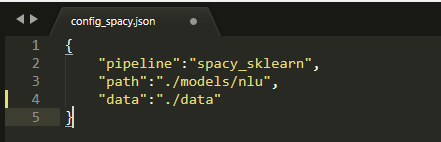
Create a file named config_spacy.json. This file contains the information about where the data is present and where the model should be stored after training. This file is essential for Rasa NLU part.

Content of the configuration file i.e. config_spacy.json should be :
STEP 4
Training the Rasa NLU Part.
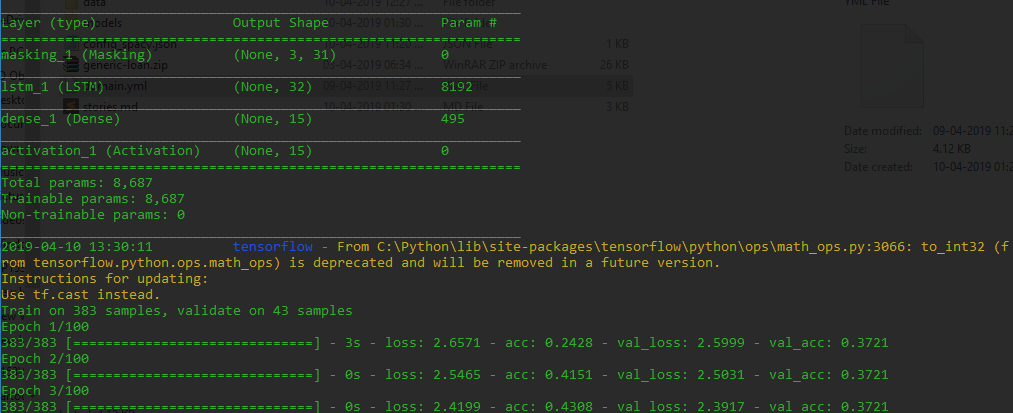
In order to do the training part, open the terminal, go to the dialogflow2rasa folder and run the given command

After pressing enter, you can see that the information generated rasa training module looks similar to below image

When the training is finished you can see that there is one more folder names models is created in the dialogflow2rasa folder, where the trained model for nlu component is stored.

STEP 5
- Proceeding with the core part
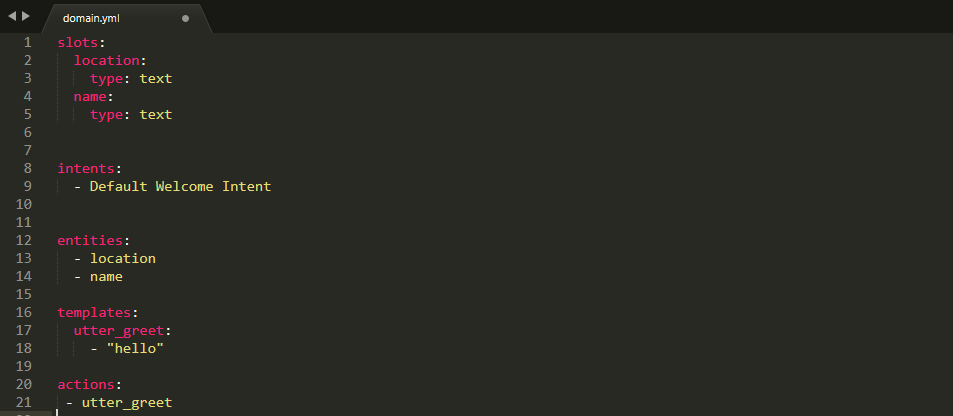
- Create a domain file named domain.yml
The Domain defines the universe in which your bot operates. It specifies exactly:
- which intents you are expecting to respond to
- which slots you wish to track
- which actions your bot can take
Below is a template for domain file named domain.yml (YAML File). Modify the domain file according to your own agent
Below is the template for a story file named stories.md
Stories(training data for Rasa core component) --> A training data sample for the dialogue system is called a story.
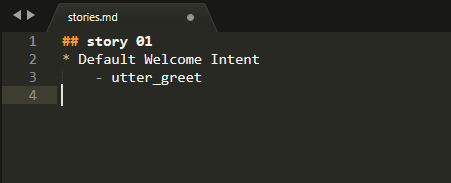
Modify the stories.md file according to your own agent
There are two ways of creating the stories.md file
- To write the stories.md file manually
- To start the Rasa core in online training mode and automatically generate the stories in the Rasa core format from human interaction. But for thsi also some sample stories are needed.
Save both the files domain.yml as well as stories.md in dialogflow2rasa folder

STEP 6
Training the Rasa core part
In order to train the core part open the terminal and go to dialogflow2rasa folder and run the command given in the image

During training your terminal should display information similar to below images

STEP 7
Running Rasa stack as http server
Follow these steps:
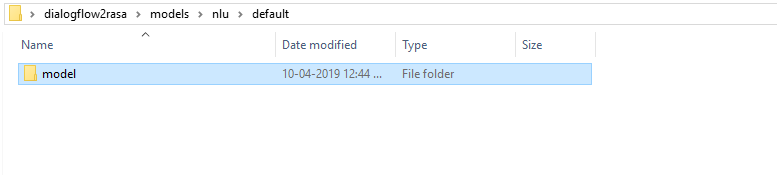
- Go to dialogflow2rasa > models > nlu > default
- A folder named model_XXXXXXXXXXXXXX would be present

- Rename that folder to model only. This enables us to up the Rasa in http server form easily as we have to pass the name of the nlu model and model_XXXXXXX ia not a convinient name to type in the terminal
For training, open terminal, go to dialogflow2rasa folder and run the below mentioned command

After running above command, your terminal will display information similar to below image. As you can see the server started listening on port 5005
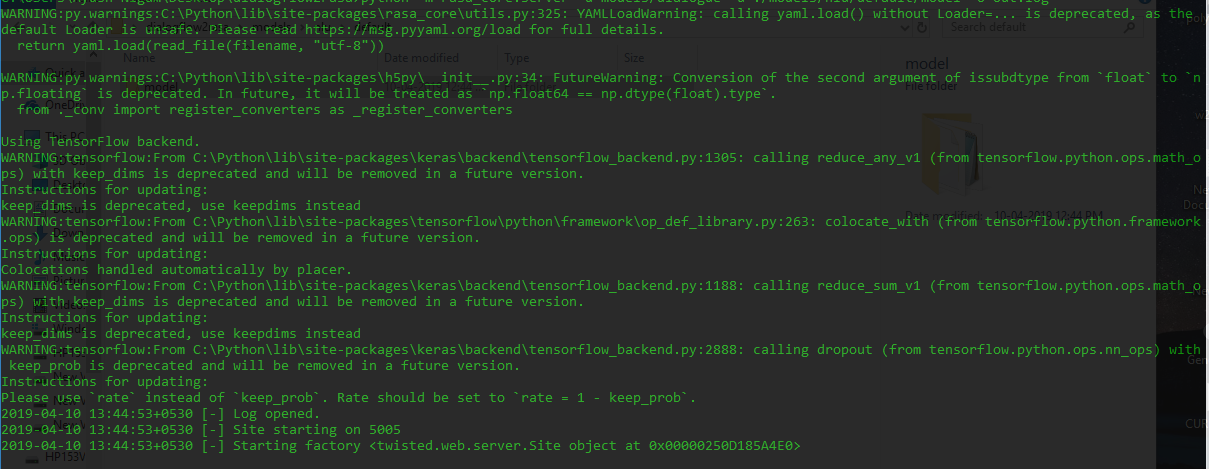
you can see the logs in the dialogflow2rasa folder in out.log file
 Guide for querying the http server
Conclusion
As one can see the ease and simplicity with which migration of agent can be achieved, it is not a herculean task to privately own the NLP server that one is using for powering their chatbots