Super simple steps to enable CI on Gitlab using Jenkins


I was blissfully settled with Bitbucket as my repository. I was able to configure it for continuous integration, continuous deployment and even extended to continuous delivery
However my village of peace was soon disturbed by the features and offers by Gitlab. Though the topic is not focussing on Gitlab, i will briefly touch upon it. Before taking the trouble of knowing the steps to integrate Jenkins with Gitlab, i think it is a good idea to have a strong reason to take all the trouble. Let me put it in two perspectives.
The first perspective - technically Gitlab has all the features required to implement the automation tools required to implement DevOps. Every feature throw at the industry by a repository through the years, are all available in Gitlab.
The second perspective - the commerical and engagement model is very convenient for folks like my organisation. It is totally open source. That means you can host it in your own data center and tweak it to your likes. We can have unlimited private respositories. Where as the other brothers of Gitlab, like Github abd Bitbucket impose restrictions on number of repositeries, number of users or size of the repository. On top of that they are not open source.
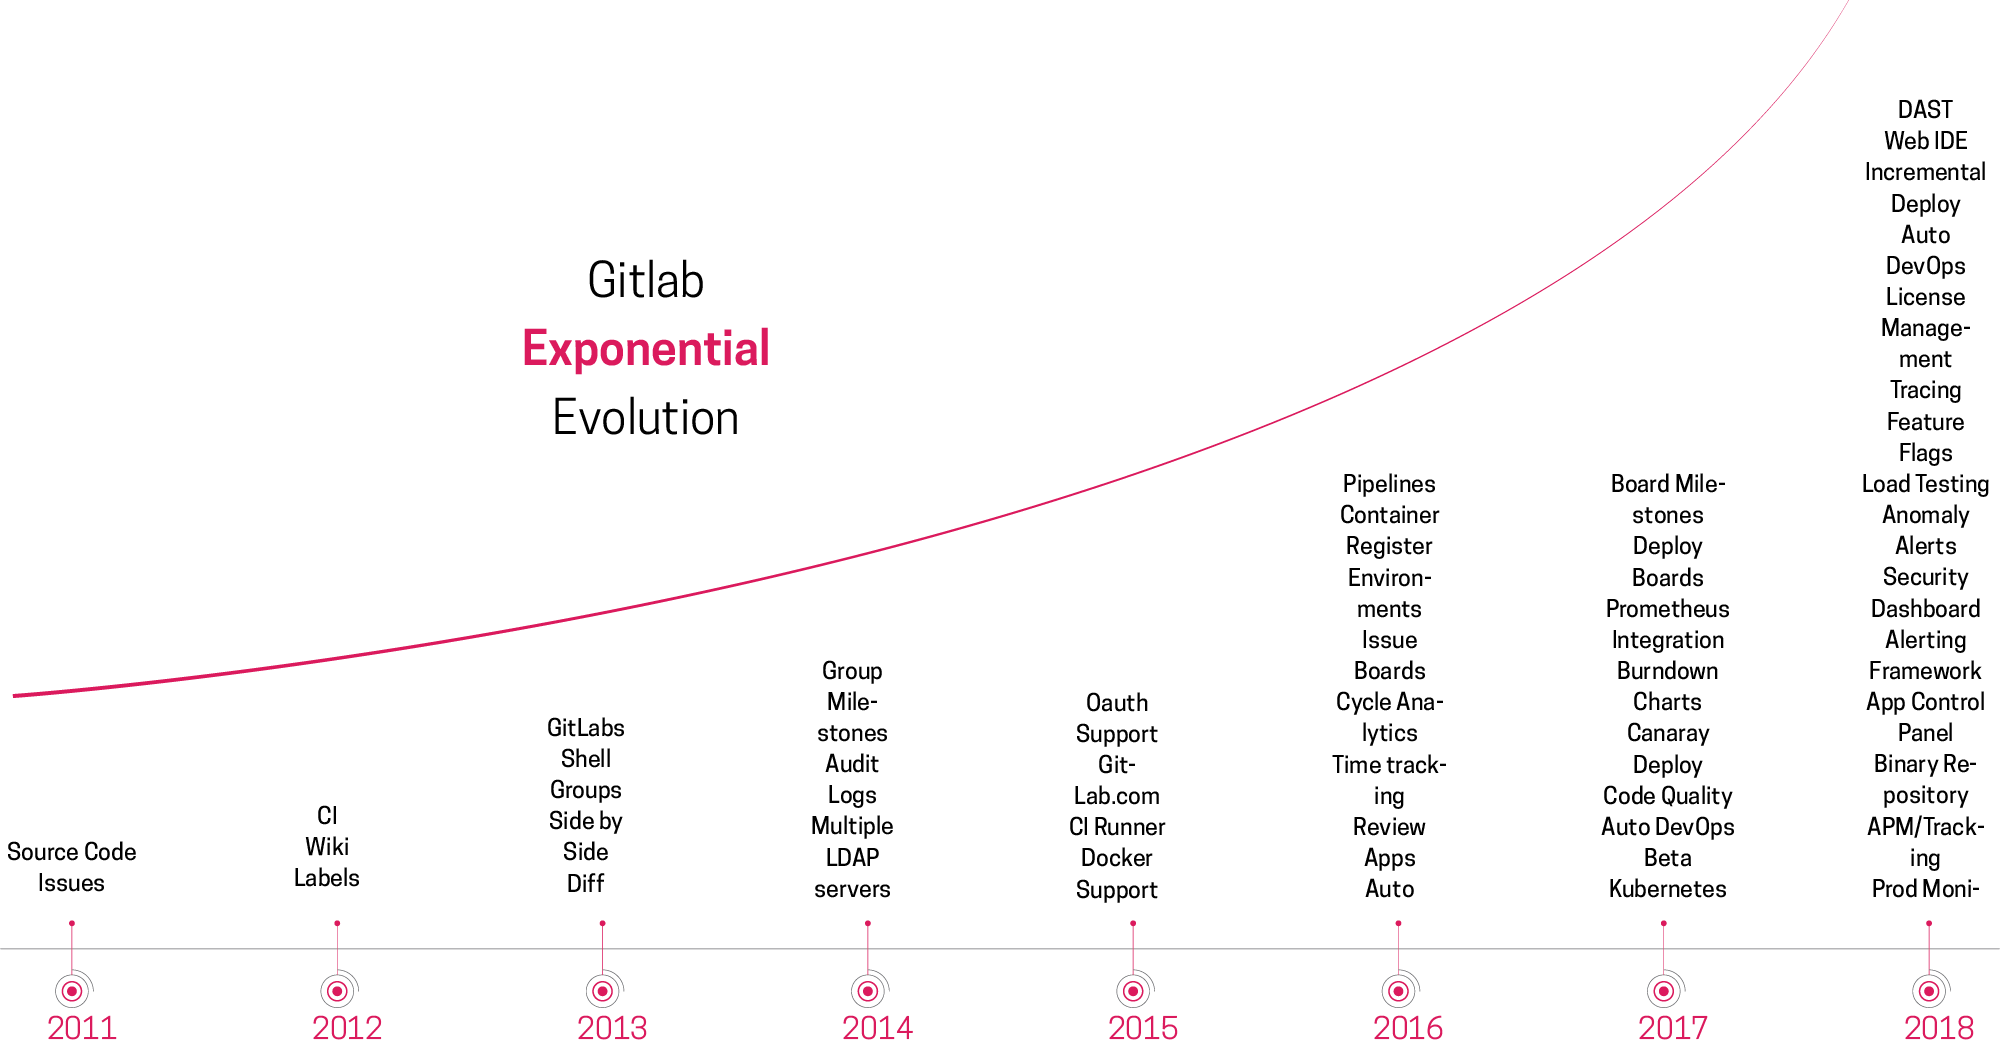
So, that was strong enough reason for me to switch to Gitlab - the most infuential reason was Gitlab being free for unlimited number of repositories. Here is a chart that demonstrates the commitment of Gitlab team to make sure that the products stays on top of the curve.
Configure CI with Gitlab and Jenkins
Assumptions And Pre-Requisites
This article makes the following assumptions:-
- You have a running Jenkins stack.
- Gitlab account and an existing project.
- A user on Jenkins to interact with Gitlab (deploybot@simpragma.com)
STEP - 1
Install Gitlab Hook Plugin (skip if already installed)

- Login to Jenkins and click on "Manage Jenkins"
- Under manage jenkins navigate to "Manage Plugins"
- Click on Available tab
- Search Gitlab Hook Plugin
- Install and configure it
STEP - 2
Configure Jenkins job

- Configure your jenkins job to run when a push event is triggered on a specific branch (eg. master)
STEP - 3
Add Personal Access Tokens

- Login to your Gitlab account, click on settings. Navigate to Access Tokens
- Give a name to your token, expiry date (optional)
- Check the right scopes for the access token
- Finally click on create personal access token
STEP - 4
Configure User on Jenkins (Gitlab API Token)

- Login to Jenkins and visit Credentials > System > Global Credentials
- Select Gitlab API Token
- Fill in the API token generated from the above step (Step-3)
- Write the description and click OK to save
STEP - 5
Configure SSH username with private key

- Generate a SSH key with your email (command: ssh-keygen -o -t rsa -b 4096 -C "deploybot@simpragma.com")
- Login to Jenkins and visit Credentials > System > Global Credentials
- Select SSH username with private key
- Fill in all the details and click OK to save
STEP - 6
Deploy Keys on Gitlab (to enable jenkins user i.e deploybot@simpragma.com) to have access to the repository)

- Click on Project settings followed by Repository
- Navigate to Deploy Keys
- Scroll down to "Enabled deploy key", it should be displaying a message "No deploy keys found. Create one with the form above"
- You can create a new one from the form or if you have an existing one (that's what, it is in our case) then click on "Privately accessible deploy keys"
- You should be able to find your keys in the listing, click on enable
- Now again go back to Enabled deploy keys, to check if your keys are enabled
STEP - 7
Adding the Webhook

- Login to your gitlab account
- Go to your project where you want to configure CI
- Click on project Settings on the left sidebar, followed by Integrations
- To add your webhook provide your webhook url under the URL box, in our case it is https://cd.simpragma.com/gitlab/build_now (General: http://your-jenkins-server/gitlab/build_now or http://your-jenkins-server/gitlab/notify_commit)
- Under Trigger section, check "Push events" and specify the branch name, in our case it is master
- Under SSL verification, check enable SSL verification
- Click on Add Webhook
STEP - 8
Test your Webhook

- To test your webhook, visit your Project settings and click on Integrations
- Navigate to your webhook and click on Test followed by Push events
- You will receive a HTTP 200 success message if the webhook is implemented properly