Playing with Pi, AI and Python


I many times get facinated by automation to help us get rid of mundane activities and boosting efficiences.
I have a lot of hunch to try out various things. On top of that, my friends provoke me asking me for solutions. For instance if I dont heat milk in my resturant on time, it gets spolit, can I monitor and heat it remotely, I want to track movement of tools inside my office, I want to know if the customer has already visited my shop and so on.
The Innovation Wave
Due to digital transformation almost everyone has become tech savvy, my laundary guy, my milk guy, my news paper guy, my vegetable guy and every friend. One thing that motivates me to get into action is my experience of just talking and not doing. In few weeks I see someone else implementing it and cashing out of it. Then I feel that I just missed a great opportunity. However, now digital technology makes things very fast and easy to try.
Pi, AI and Python
Raspberry Pi is a simple microcomputer that has been highly adapted for quick digital experiments. It has all the components onboard to simplify integration with other hardware like camera, relay, switch and motor. I have been able to use Raspberry Pi in multiple applications. However, there is always a skepticism from my Electronics partner NGX ( http://www.ngxtechnologies.com ) that this is OK for POC, but for production we will need to put a custom industry strength hardware in place. I readily agree. And I strongly feel to confine the scope of such off-the-shelf microcomputers for POC
Artificial intelligence now does not require us to get into low level stuff like mastering fourier series before we do image recognition, R programming language and OpenCV help us implement solutions in a jiffy. Identifying free slot of car parking, face recognition and all such must-have applications are very quick to try out.
Python programming language has all the programming paradigms available in all the great languages developed till today, has many open source libraries available for integration. Most of the times I change my programming utilties and daemons from Java to Python because of the latter being rich in libaries. We ending up writing stunning short programs when we opt Python.
This makes our little garage ready to launch our startup lab. We will build a low-cost raspberry pi QR code + bar code scanner. Here is how we go about this:
Physical Components:
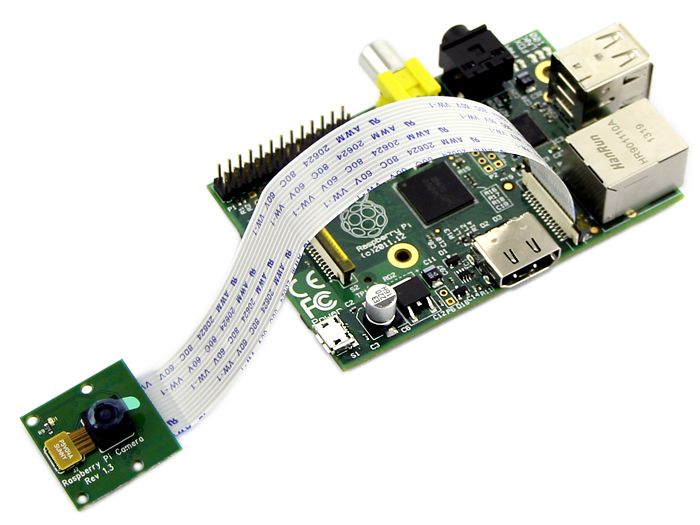
- A microcomputer with a camera attached: For the tutorial purpose we are using raspberry pi with pi-camera (web camera that has a USB interface will also work)
- A power source to power raspberry pi: Any standard mobile charger with micro USB would work
- A display module: A simple monitor can be directly connected to the raspberry pi or a separate display module can also be used
My focus in this blog is not to tell the setup of raspberry pi but to get into the programming aspect of it.
So let's get started !
General Idea
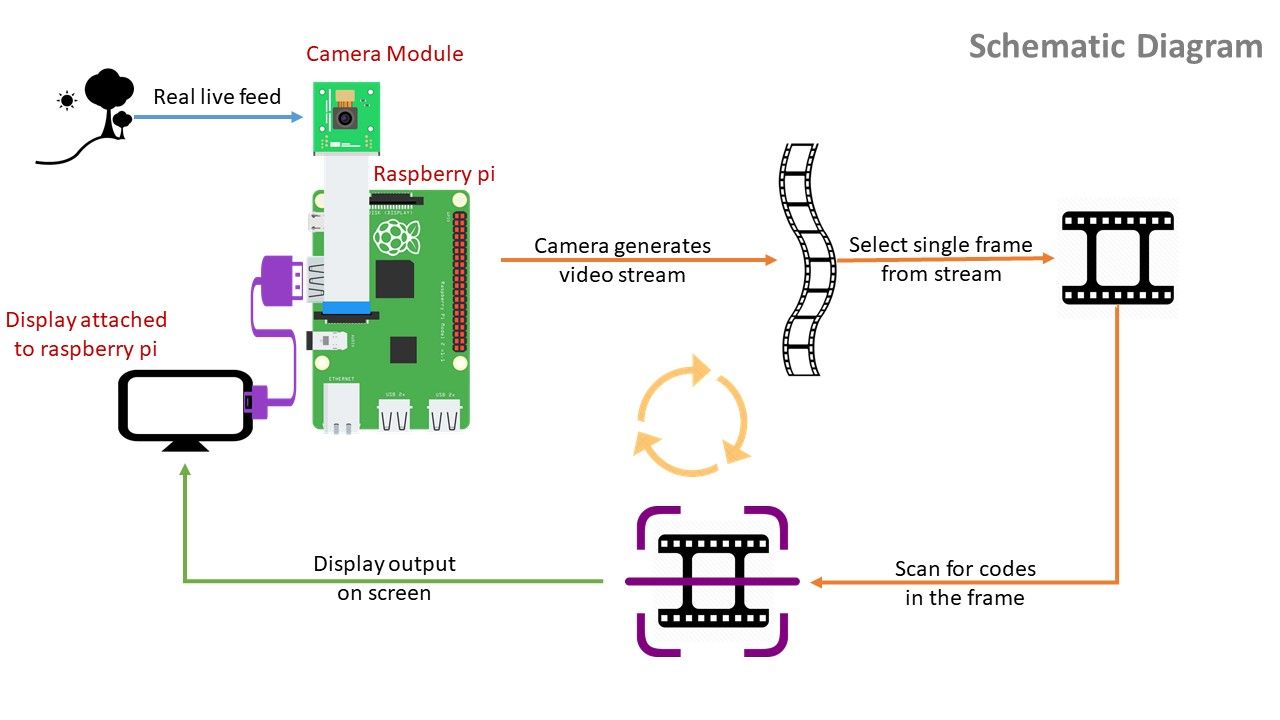
General idea is to keep scanning the frames present in the video stream that is generated by camera attached to raspberry pi.
Schematic diagram for the same is given below:
Directory Structure
.
├── code_scanner.py
└── found_codes.txt
There are two files in the directory
code_scanner.py: a python script to implement functionality
found_codes.txt: text file where all found codes are to be saved or logged
Code Segments
Code segments in the python script are:
1. Importing packages
2. Argument parsing
3. Camera Setup
4. Logging the findings
5. Frame processing
6. Clean up
Let's have a look at each code segment one by one !
1. Importing Packages
In this code segment, all the necessary packages are imported.
Packages and their purpose are as follows:
- VideoStream from imutils.video: for handling video stream generated by the camera attached to the raspberry pi
- pyzbar: to handle decoding of QR codes and barcodes
- argparse: for handling arguments passed during runtime
- datetime: for retrieving data and time of the system so that codes can be logged with date and time
- imutils: for image utility functions
- time: to halt further execution so that hardware can initialize
- cv2: important functions to process image

2. Argument parsing (not a core part)
In this code segment constructing the argument parser and parsing the arguments is done. This code segment is not the core part of the program and can be eliminated. This code segment enables the user to give file path of the output file where entries are to be logged.

3. Initializing the camera
The camera attached to raspberry is a hardware resource and hardware resource just doesn’t start working in quantum time, which means some time is to be allocated for it to boot up.
In this code segment, the video stream from the camera is initialized by allowing some time for the camera sensor to boot up.

4. Logging the findings
In this code segment, the file in which the decoded information from QR codes or barcodes is to be logged is initialized. For the purpose of writing the blog we have used a text file but one can use other types of the file say the information is much more sensitive.
Initialization of the set of codes is also done so the findings can be stored at the runtime before writing it to the disk

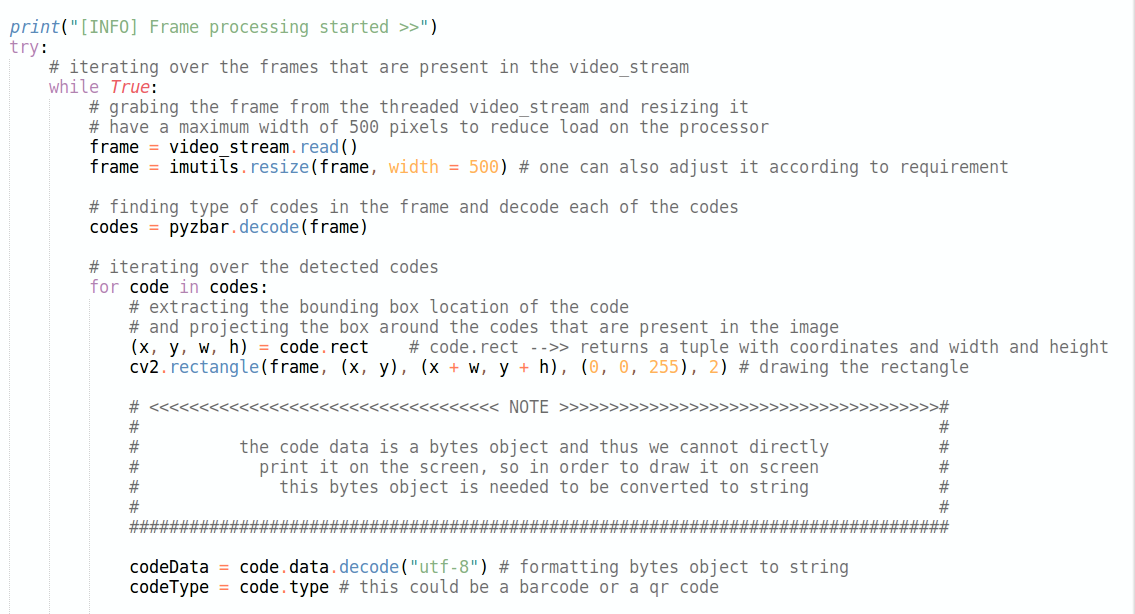
5. Frame Processing (core part)
In this code segment, the frames from the video stream are continuously processed so that the codes present in the video can be decoded accordingly.
This code segment has multiple code segments itself, these are as follows:
- Getting frame from video stream: In this part, a frame from the continuous video stream is captured and resized. Resizing is done in order to show the frame to the user and also to reduce the unnecessary processing of the full image.
- Code searching: QR codes and barcodes are searched in the frame using pyzbar library.
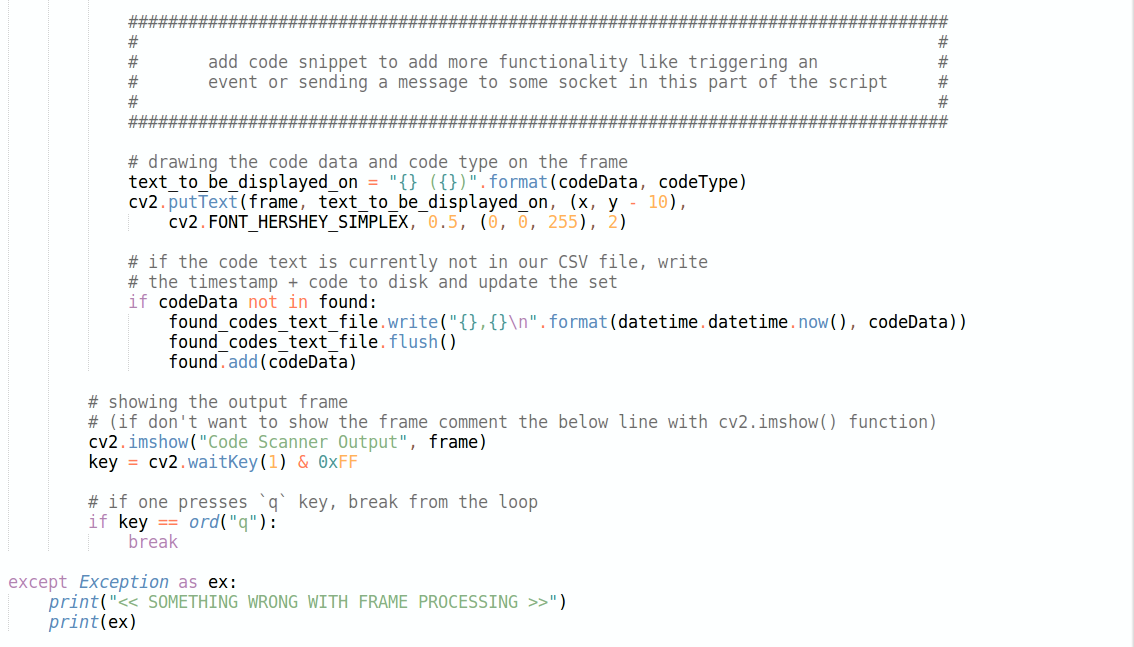
- Displaying decoded message around found codes: This part can also be skipped but to get sure that whether the scanner is working fine or not it is recommended one. Since there can be more than one code present in the frame, iteration is done over each found code and a rectangle along with the message that it represents is projected around the respective codes.
- Logging the findings: writing the decoded codes to the to the file.
- Setting the key: setting up the key to break the loop and stop the execution of the program.
6. Cleaning up
Opened streams, files, and windows are closed in this segment of the code.

# ERROR HANDLING
All the code segments have their respective try-catch blocks to handle errors during program execution.
# Running the script
Running this script is as simple as running any python script
Just go to the diretory where files are present, open the terminal and type:
$ python3 code_scanner.py -o found_codes.txt
and press enter
you will see a window displaying the feed to the camera and when you put a QR code in front of he camera, the string that is encoded in the QR code will be displayed on the screen.
# Python Scripts
To directly download the python script, follow the link given below.
https://gitlab.com/ayushSimpragma/raspberry-pi-qr-code-scannerI thank you all for spending your valuable time reading this blog